
A PDF is not a picture. Most PDFs hold real text, and drawing a black bar over it with a pen or highlighter adds a mark on top while the words underneath may still be there. Anyone can often select, copy or search the covered text, or open the file in a different viewer and see it.
This is a common way redaction fails. Here is how to do it so the text is gone.
Why a bar on top is not redaction
A PDF can keep content in layers: the page’s text and images, and annotations such as drawings, shapes and highlights. Markup tools on a phone usually add annotations. Covering text with one hides it from view without removing it from the file.
You can test any PDF you plan to send: open it, press and hold on a covered word and see whether it gets selected, or use the search field to look for a word you covered. If a search finds it, it is not redacted.
Two ways to get it truly removed
Turn the pages into images. If every page becomes a flat picture with the black boxes burned in, there is no text left to extract, because the page no longer contains text at all. The cost is that the PDF is no longer searchable, and the file is often larger.
Use a tool with a real redaction function that deletes the underlying content when you apply it. Desktop PDF editors have this. On iPhone it is rare, so for most people the first approach is the practical one.
A third thing to check in either case: PDFs can carry metadata such as title, author and the software that made them. If that matters, look at it before sending.
Redacting on iPhone with Censor Photo
Censor Photo can take a PDF, or a document you scan with the camera, as pages you edit like photos. You draw blackout over names, dates, account numbers or addresses on each page, then export.
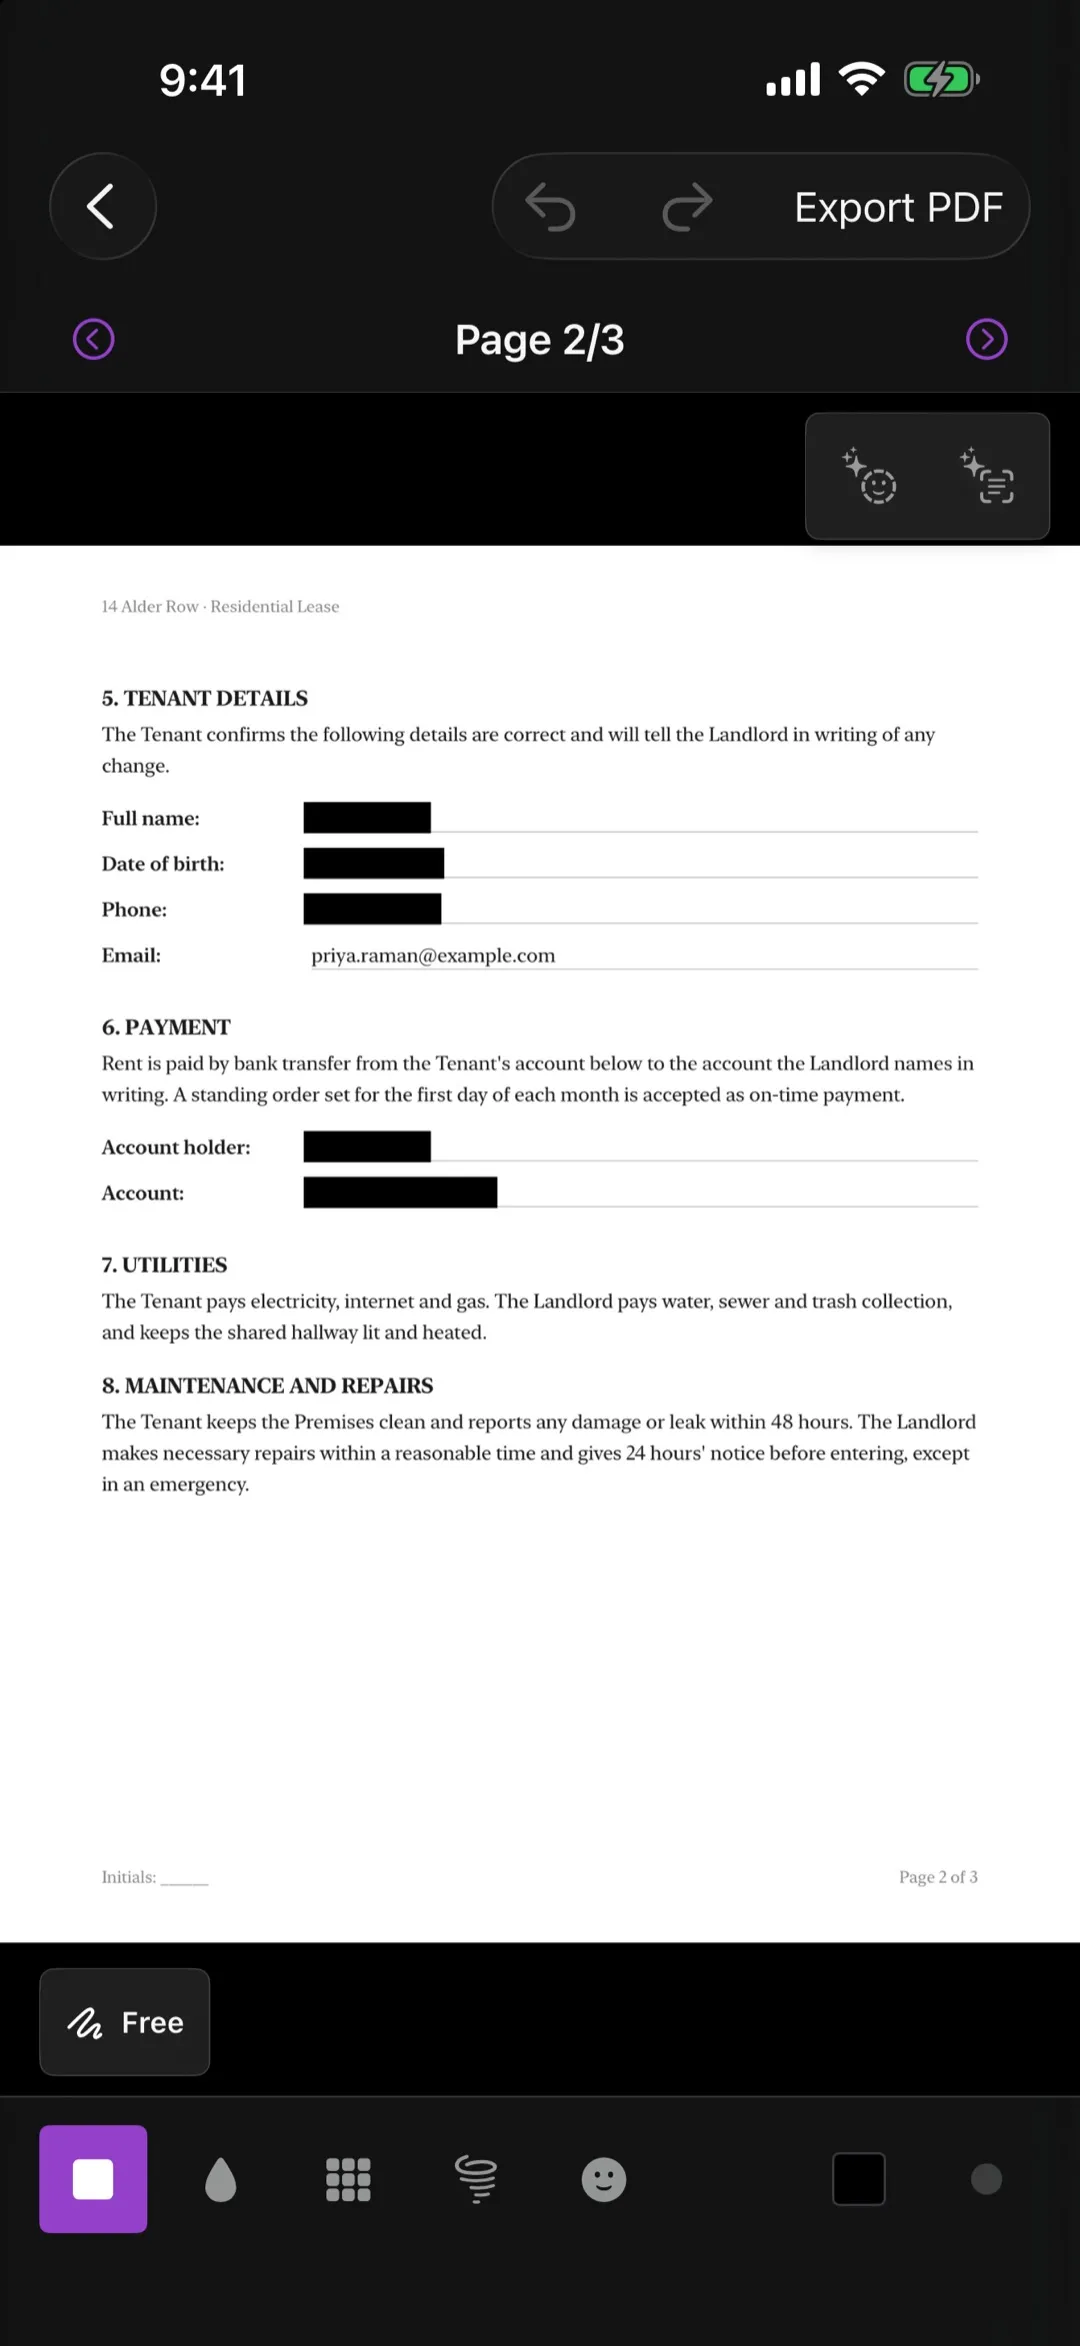
The email line is still uncovered in this demo shot; in yours, cover every identifying value.
On export, each page is flattened into an image with the covers burned in, then the pages are assembled into a new PDF. That is the first method above: the new file contains page images, not the original text. Two consequences to expect:
- The result is not searchable or selectable, even for the parts you did not hide.
- Keep your original for your own records, and send only the redacted copy.
Free handles the first page of a PDF; multi-page PDFs and scanning are Pro. Photos and screenshots are free with limited exports. Processing happens on your iPhone, and the app is not uploading your documents anywhere.
A short routine for documents
- Make a copy first. Never redact the only original.
- Cover whole values. A name, a full account number, the whole address line, with margin.
- Use solid, opaque cover. For text, blur and pixelation are not recommended; researchers have reconstructed text from them (see Bishop Fox on pixelation).
- Check each page, including headers, footers and page numbers that repeat an identifier.
- Export a flat copy and run the test: try to select and search for a covered word in the new PDF.
- Look at the file’s details such as name and metadata, and send only the new file.
When to ask for help
If a document is legally sensitive, such as court filings or documents with someone else’s medical information, follow the process your organisation or court requires. Apps and tips like these cover everyday cases, not a legal obligation.


